How to Install Your Caboose Tiny Wood Stove: A Step-by-Step Guide
Forget complicated wood stove installs that leave you guessing. Setting up your Caboose Tiny Wood Stove doesn’t have to be stressful or confusing. This step-by-step guide walks you through a safe, clear wood stove installation so your tiny home heating feels cozy and reliable from day one. Ready to get your space warm with a UL Listed wood stove built for compact heating solutions? Learn more here.
Preparing for Installation
Before diving into the specifics of installation, it’s essential to lay the groundwork. This preparation phase ensures that everything runs smoothly once you begin. Let’s get ready to make your home cozy and warm.
Gather Necessary Tools
Start by collecting the tools you’ll need. Having the right tools can make the process efficient and stress-free. You’ll need a tape measure, a drill, a screwdriver, and a wrench set. Make sure you also have a level for precise placement. With these essentials, you’ll be ready to tackle the installation.
Having the correct items at hand will prevent unnecessary delays. You won’t have to stop midway to find a tool. This preparation saves time and ensures each step is completed accurately. Consider creating a checklist to ensure nothing is overlooked.
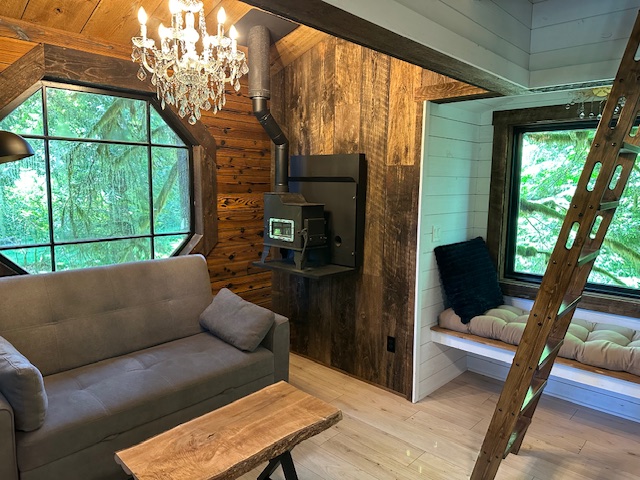
Choose the Right Location
Deciding where to place your Caboose Tiny Wood Stove is vital. It should be in a central spot to heat your space efficiently. Measure the area to ensure the stove fits comfortably. Remember, your stove needs adequate clearance from walls and furniture to operate safely.
A proper location not only maximizes heating but also enhances safety. Consider proximity to windows and doors for ventilation. This planning step prevents issues later on and ensures the warmth is distributed evenly throughout your home.
Safety Precautions First
Safety is non-negotiable when installing your wood stove. Double-check that all materials are fire-resistant. Ensure your smoke and carbon monoxide detectors are operational. These devices are crucial in keeping your home safe.
Install a hearth pad beneath your stove if your flooring isn’t fire-resistant. This added layer of protection is essential. By prioritizing these safety measures, you create a secure environment for yourself and your loved ones.
Step-by-Step Wood Stove Installation

With your preparations complete, it’s time to move on to the installation itself. This step-by-step guide will lead you through each part of setting up your stove efficiently.
Setting Up the Stove
Begin by setting your stove in the selected spot. Use the level to ensure it’s even. An uneven stove can cause inefficient burning and safety issues. Adjust the legs if necessary to achieve a stable position.
Once positioned, double-check all connections. Ensuring everything is tightly secured prevents issues during operation. This setup forms the foundation for a reliable heating system.
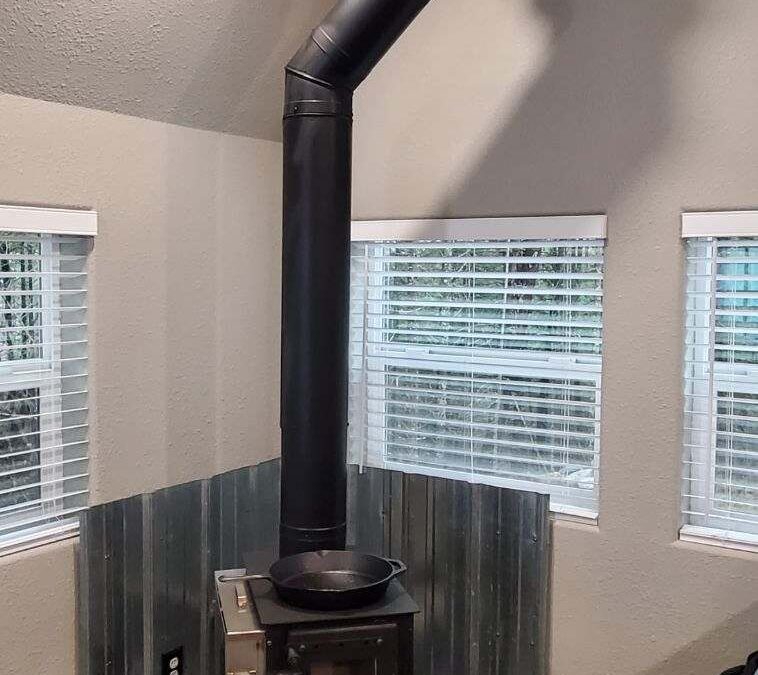
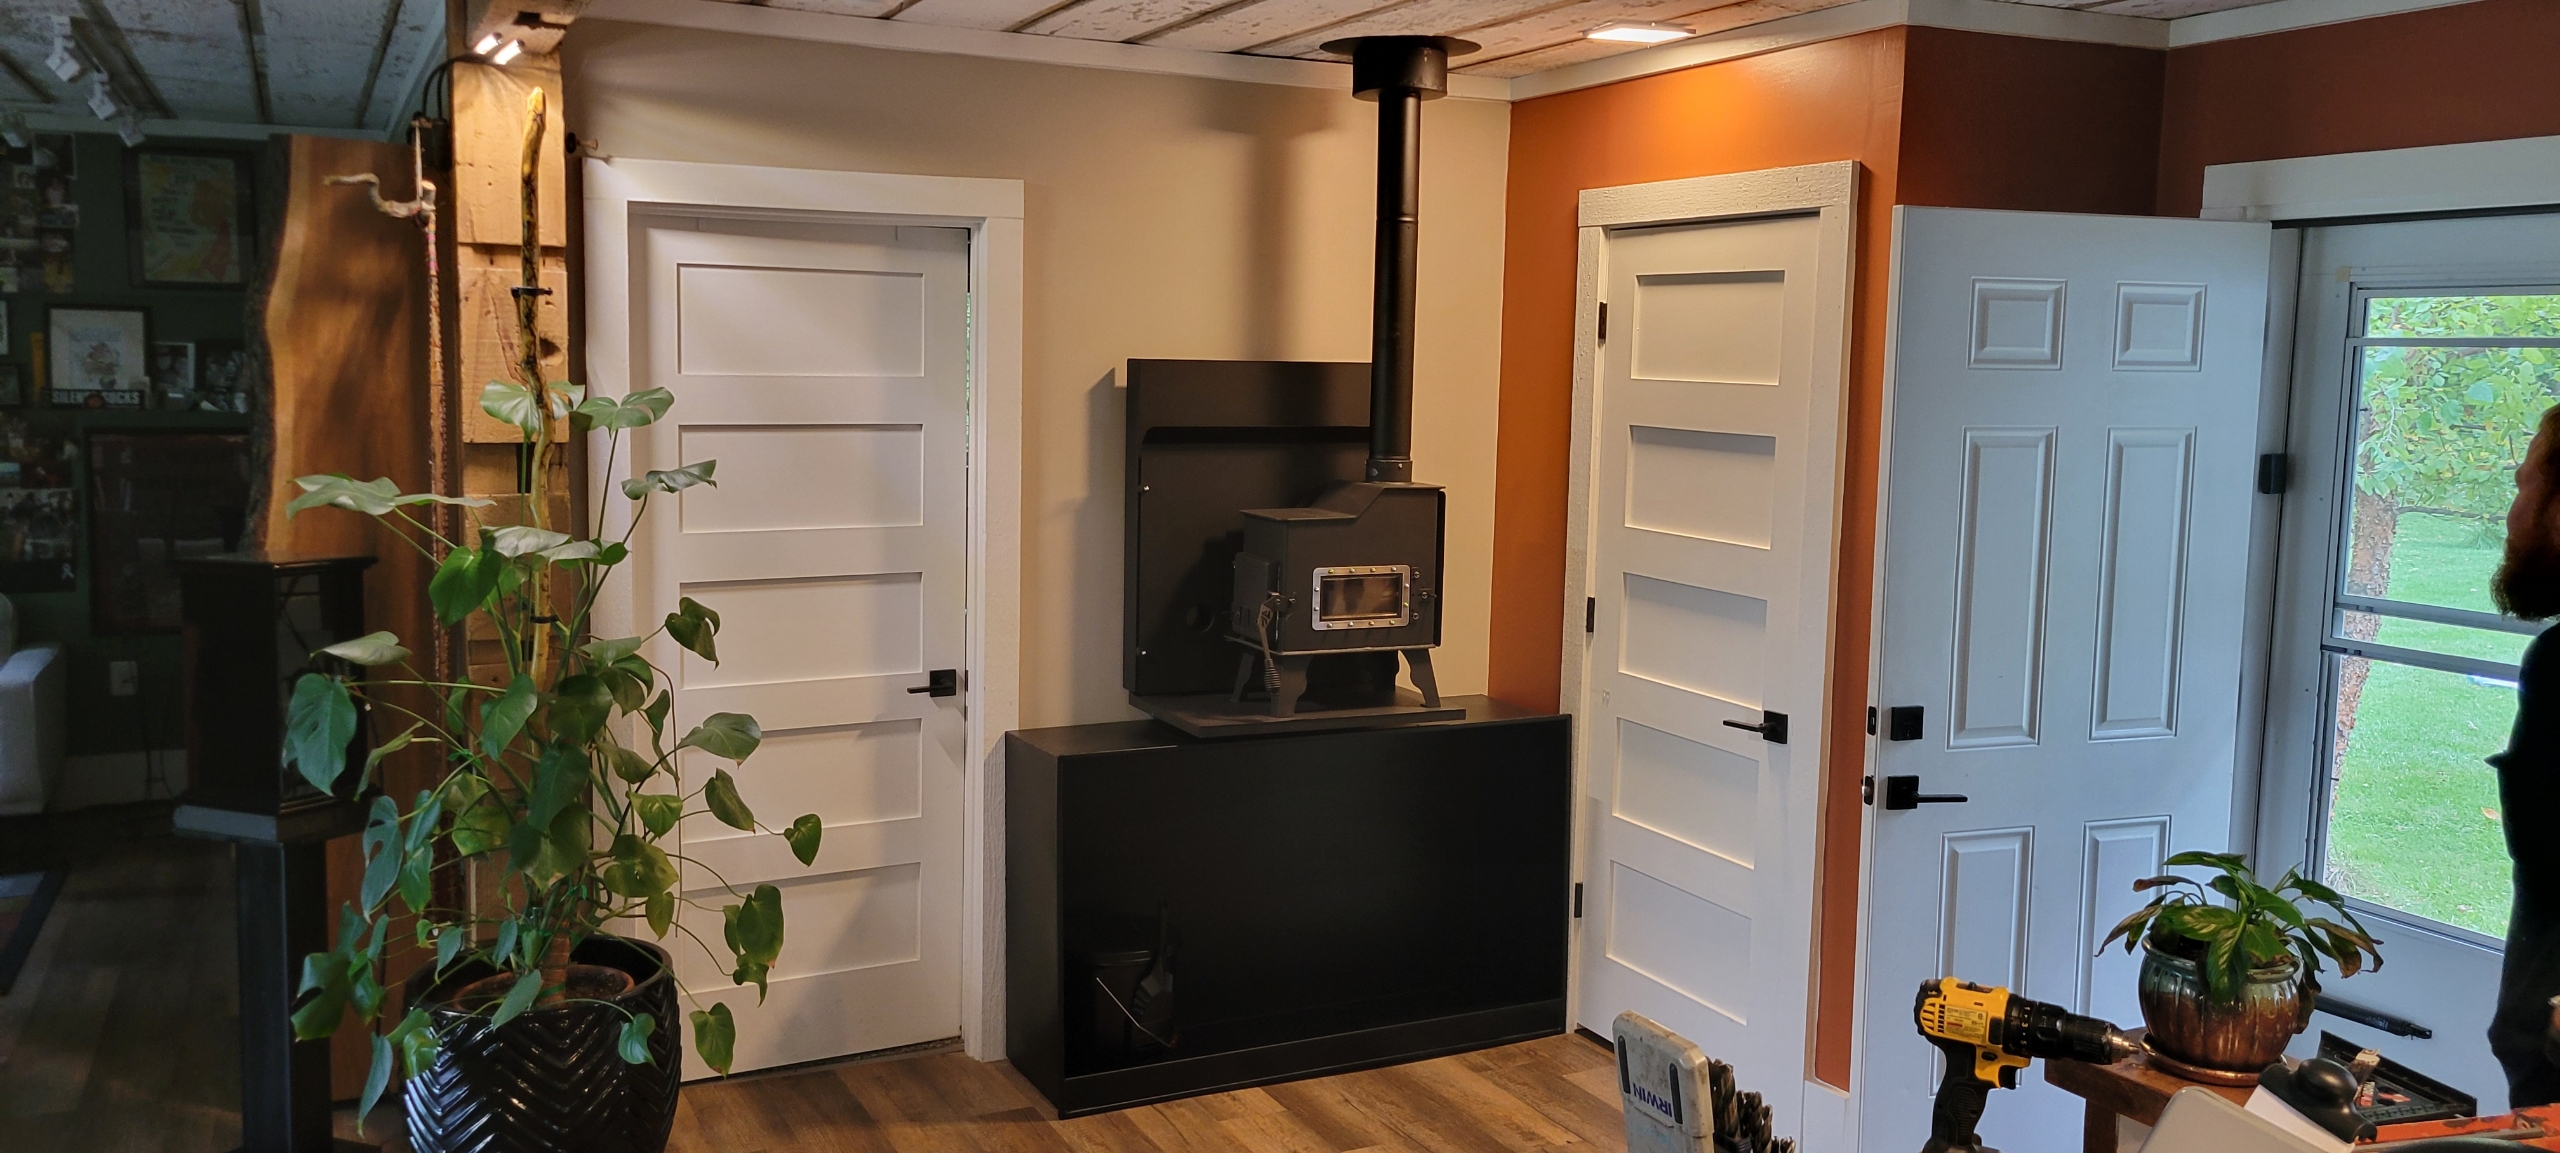
Connecting the Chimney Pipe
Attaching the chimney pipe is crucial for proper ventilation. Start by connecting the pipe to the stove’s outlet. Ensure each section is securely attached to prevent any leaks. Proper sealing is essential here.
Next, guide the pipe through the roof or wall exit. Make sure it’s angled correctly to aid in smoke expulsion. Follow the manufacturer’s guidelines for specific instructions. This step is key to maintaining a safe and efficient system.
Securing the Stove in Place
Once the stove and chimney are set, it’s time to secure the stove. Attach it to the wall if you’re opting for a wall-mounted setup. Use the appropriate brackets for a firm hold. This prevents accidental tipping or movements.
If freestanding, ensure the stove has a solid base. Consider additional supports if your flooring isn’t completely stable. Securing the stove is the final step to ensure ongoing safety and stability.
Final Touches and Testing
With the installation complete, it’s time to finalize everything for optimal performance. These last checks ensure your stove is ready to provide warmth effectively.
Inspecting for Safety
Conduct a thorough inspection of the entire setup. Look for any loose connections or improperly sealed sections. Address these immediately to prevent future issues. Your peace of mind is important, and this step ensures it.
Check clearances and make any needed adjustments. Ensuring everything is in place keeps your home secure and your stove functioning at its best.
Initial Burn Test
Performing an initial burn test is essential. This helps you verify that everything operates correctly. Light a small fire and observe how the stove functions. Check for proper smoke expulsion and consistent burning.
During this test, pay attention to any unusual smells or smoke inside the home. This process confirms that your installation was successful and safe.
Enjoying Your New Heating Solution 🔥
Congratulations, your Caboose Tiny Wood Stove is ready to use! Enjoy the warmth and comfort it brings to your space. You’ve invested in a reliable heating solution that will serve you well in the cold months ahead.
Remember, a well-installed stove is a joy to use, providing both warmth and a cozy atmosphere. Keep this guide handy for future reference or adjustments. Enjoy the peace and comfort of your efficiently heated home.