Most people shopping for a wood stove for home heating start in the wrong place. They browse product listings, compare BTU ratings, and pick a model that sounds powerful enough, only to end up with a stove that either struggles to heat the room or turns the space into an oven. The problem is not the stove. The problem is the order of operations.
Before any product enters the conversation, you need a clear picture of your space: how it loses heat, how well it holds it, and how you actually plan to use a stove day to day. Those variables determine your target output range far more accurately than any label claim.
This guide walks you through that diagnostic process from the ground up. You will learn how to measure your heat loss, why floor area alone is not enough, how insulation and construction type shift your numbers, and how burn habits change everything. By the time you reach the product selection section, you will have a defined profile to match against real stoves, giving you confidence instead of guesswork.
Why Sizing Comes Before Shopping
The problem is that a BTU rating on a spec sheet tells you nothing about whether that stove can actually heat your specific space efficiently and safely. Matching the stove to the space requires understanding what your building actually demands, and that work has to happen before you look at a single model.
An oversized stove creates problems most buyers never anticipate. When a stove produces more heat than the space needs, you compensate by restricting the air supply and running it at low burn settings. Starved of oxygen, combustion becomes incomplete. Wood smolders rather than burns cleanly, and that smoldering produces creosote, the flammable residue that accumulates in chimneys and flue pipes, and is a serious fire hazard and a direct product of smoldering combustion. Chronic smoldering also means the stove never reaches the temperatures where it performs as designed.
An undersized stove carries its own costs. It runs at full output every burn cycle trying to keep up, which accelerates wear on the firebox and components. On the coldest nights, it still falls short. You end up burning more wood for less comfort and replacing the stove sooner than you should.
Heating a home with a wood stove successfully depends on matching the stove’s output to your building’s actual heat loss rate, not to a rough square footage figure. Construction quality, insulation levels, ceiling height, and climate zone all shape that number. If you want to understand what efficiency ratings actually measure and how they factor into sizing, this guide to high efficiency wood stoves is a useful companion resource.
This guide builds the diagnostic framework first. By the time you reach specific models, you will already know the output range, firebox size, and feature set your situation actually calls for.
Understanding Heat Loss: The Real Starting Point
Heat loss is the rate at which your home sheds warmth to the outdoors. That rate, measured in BTUs per hour, is the actual number your stove must match. Square footage gives you a rough starting point, but two homes with identical floor plans can have dramatically different heat loss rates depending on how they are built.
The variables that drive heat loss most are:
- Wall and ceiling insulation R-value: Higher R-value means slower heat escape through the building shell
- Window area and glazing type: Single-pane windows lose heat substantially faster than quality double-pane units, making window type a meaningful factor in your heat loss calculation
- Floor construction: A slab-on-grade loses heat downward into the ground; a raised or basement foundation behaves differently
- Air infiltration: Gaps around penetrations, unsealed attic bypasses, and aging weatherstripping allow warm air to escape continuously, often accounting for more heat loss than walls and ceilings combined
Thermal mass adds another layer. A stone or masonry structure absorbs heat slowly but releases it for hours after the fire dies down. A wood-frame house of identical square footage heats up faster but also cools faster once the burn cycle ends. That difference affects how large a single load needs to be and how often you will reload.
A practical field method: Turn off your heat source on a cold night and log the indoor and outdoor temperatures every 30 to 60 minutes. The rate of interior temperature drop, relative to the outdoor temperature, gives you a real-world heat loss signal that no generic calculator can replicate.
Climate zone is a significant multiplier. A 1,200 sq ft cabin in northern Idaho or Montana may face design temperatures 40 to 60 degrees colder than the same structure in the mid-Atlantic, requiring substantially higher stove output to hold the same interior temperature. Location shapes the output range you need before anything else.
If your heating situation involves a fuel source other than wood, the Small Pellet Stove Buyer’s Guide: What Actually Matters covers how to apply similar diagnostic thinking to pellet stove selection.
Square Footage vs. Room Volume: Why the Floor Plan Only Tells Part of the Story
Heat loss tells you how fast your space loses warmth. But before that calculation means anything, you need to know how much space you’re actually dealing with, and square footage alone won’t give you that answer.
Square footage is a floor measurement. It says nothing about ceiling height, open loft areas above the main level, or the total cubic volume of air your stove must heat and hold. That distinction matters more than most buyers realize.
Consider this: a 900 sq ft open-plan cabin with 14-foot vaulted ceilings contains roughly 12,600 cubic feet of air. A 1,200 sq ft ranch with standard 8-foot ceilings contains about 9,600 cubic feet. The smaller cabin, by square footage, actually presents a larger heating load. A stove sized for the ranch would be undersized for the cabin, even though the cabin has 300 fewer square feet on paper.
The calculation is straightforward. For each zone, multiply length × width × ceiling height to get cubic footage. Add any open loft or mezzanine volume that connects to the main space without a door. Treat rooms separated by walls and closed doors as partially independent zones, the stove won’t heat those as directly, so they shouldn’t drive your sizing.
This is where wood stove sizing for small homes goes wrong most often. Buyers use whole-house square footage when the stove is only meant to heat one primary zone. That inflates the apparent heating load and leads to an oversized stove that runs chronically at low settings.
Open floor plans actually work in your favor for wood stove heating. Radiant and convective heat distribute naturally through connected space without ductwork. The tradeoff is that the stove carries the full, undivided volume. Size accordingly.
How Insulation and Construction Type Change Your Target Output
Volume tells you how much air the stove must heat. Construction quality determines how fast that heat escapes. Both variables belong in the same calculation.
A well-insulated modern home with R-19 walls, R-38 ceiling insulation, and double-pane windows loses heat significantly more slowly than an older, drafty structure of identical square footage. That slower heat loss rate translates directly to a lower required stove output. Two homes of the same size can need meaningfully different stoves simply because of how well their envelopes hold heat.
Construction type is a sizing category, not just a footnote. Each building type behaves differently:
- New construction with modern insulation standards: lowest heat loss per square foot; stove output requirements are relatively modest
- Older wood-frame home with retrofitted insulation: performance varies widely depending on how thoroughly the work was done
- Log cabin or timber frame: thermal mass moderates temperature swings, but log walls have lower effective R-values than insulated stud walls
- Manufactured or mobile home: often tightly sealed but with thin wall assemblies; verify stove clearance requirements before sizing
- Masonry or adobe construction: high thermal mass slows both heat loss and heat gain, favoring longer, steadier burn cycles
Air infiltration is frequently the largest unaccounted variable in the entire sizing equation. In older homes with single-pane windows, unsealed attic bypasses, and gaps around plumbing or electrical penetrations, air leakage alone can exceed total heat loss through walls and ceilings combined.
Before settling on an output range, evaluate your home envelope honestly. Check insulation grades in the attic and walls, note window age and condition, and determine whether a blower door test or professional energy audit has ever been performed on the structure.
If significant air leakage is present, addressing weatherization before finalizing your stove selection is worth serious consideration. Sealing bypasses and adding weatherstripping can shift your required output range downward and improve the day-to-day performance of whatever stove you install. Those improvements also affect installation planning; for a full overview of what installation involves from the start, see our guide on how to install a wood stove.
Burn Habits and Use Patterns: The Variable Most Buyers Ignore
Once you have evaluated your building envelope, the next variable is one most buyers never consider at all: how you actually plan to use the stove.
Primary heat, supplemental heat, and emergency backup are three fundamentally different sizing scenarios. A stove you load twice a day from November through March needs to operate comfortably in its mid-range output, day after day. A stove you run on shoulder-season evenings or during power outages has a completely different performance profile.
Continuous daily burns favor a medium-output stove running at its design range rather than an oversized stove throttled down to low settings. A properly sized stove running in its mid-range burns efficiently and maintains consistent heat.
Intermittent use patterns favor responsive output. If you are heating a weekend cabin from cold, or running the stove for three hours each evening, you need a stove that reaches comfortable temperatures within a single burn cycle rather than one optimized for extended steady-state operation.
Fuel quality matters as much as stove selection. Seasoned hardwoods like oak, hickory, and maple at or below 20 percent moisture content deliver significantly more usable heat per load than green wood or wet softwood. Wet wood burns cooler, produces more smoke, and accelerates creosote buildup regardless of stove quality. A moisture meter is a worthwhile, inexpensive investment before any burn season.
Airflow regulation makes a meaningful difference across varied use. Stoves that can maintain clean combustion at both medium and high output give you flexibility as conditions change. If you want to understand how design choices affect real-world efficiency, our guide to high efficiency wood stoves and what the term actually means is worth reading alongside this one.
BTU Claims on Stove Labels: What They Mean and What They Do Not
Once you understand your burn habits, the next variable to decode is the number printed most prominently on the stove spec sheet: BTU output.
BTU stands for British Thermal Unit, a measure of heat energy. One BTU is the amount of energy needed to raise one pound of water by one degree Fahrenheit. Stove output is expressed in BTUs per hour (BTU/hr), representing how much heat the stove can deliver over time at a given burn rate.
The problem is what that number does not tell you.
Manufacturer BTU ratings are measured under controlled test conditions: kiln-dried or carefully seasoned hardwood, specific load weights, and regulated burn rates. Those conditions may not reflect how you actually burn. If you load the stove with wood at 25 percent moisture content or vary your burn intensity through the day, your real-world output will differ from the label figure.
A more practical comparison metric is the manufacturer’s recommended heating area range. That range typically folds in assumptions about insulation quality, so it translates more directly to your situation. Pay attention to whether the range is stated for well-insulated or average construction. A stove rated for 1,500 square feet in a tight, modern home may fall short in an older, drafty one of the same size.
EPA certification adds a meaningful layer of reliability. Certified stoves are independently tested by an accredited laboratory and must meet progressively tighter particulate emission standards. As part of that process, heat output is measured under a standardized protocol, giving you a more defensible baseline than uncertified manufacturer claims. If you want strong heat output you can trust, EPA certification is a useful starting filter.
The practical rule: treat the manufacturer’s heating area range as your starting point, then adjust for your actual conditions. Well-insulated, tight construction lets you select toward the lower end. Older, drafty structures or extreme cold climates push you toward the upper end or the next size up.
Sizing by Application: Small House, Whole Home, and Zone Heating
Once you understand what label ratings actually mean, the next step is matching your stove to how you intend to use it.
Small spaces under 800 square feet demand a compact stove with a moderate output range. This is where oversizing causes the most problems. A stove with too much capacity for a tight, well-insulated small house will overheat the space quickly, forcing you to dial the air down and run the stove in a smoldering, inefficient range, the same creosote problem described in the sizing section above. Compact options like the Caboose are purpose-built for exactly this scenario.
Whole-home heating across 1,000 to 2,500 square feet requires both adequate output and strategic placement. Central installation matters as much as BTU capacity. A stove placed in a corner of an L-shaped floor plan will heat that corner well and leave the rest of the home dependent on convective drift.
Zone heating is the most practical approach for most homeowners. Rather than sizing a stove for your entire house, size it for the primary living zone where you spend most of your time. A backup system handles bedrooms and outlying rooms. This method keeps the stove running in its efficient mid-range rather than at extremes.
Cabins and older off-grid structures are a different challenge. Poor insulation, minimal weatherization, and exposure to extreme temperatures mean higher heat loss per square foot than a modern home of the same size. Plan for a larger output range than square footage alone would suggest.
Shops and garages sit in their own category entirely. High ceilings, uninsulated walls, large door openings, and intermittent use all push output requirements significantly higher per square foot than residential applications. Size generously and expect fuel consumption to match.
Matching Your Profile to the Right Stove
Once you have worked through zone volume, insulation quality, climate zone, and burn habits, those variables consolidate into a simple profile: your target output range, the firebox size your typical log length requires, your installation footprint, and any local regulatory requirements. That profile is what you match to a stove, not the other way around.
For compact spaces and small house wood stove applications in well-insulated construction, the Flame Innovation Caboose is a UL-listed compact wood stove built for smaller homes, tiny homes, and cabins where both space and output are genuinely limited. It delivers meaningful heat without overwhelming a tight, well-sealed living area.
For small to mid-size homes and cabins that need a step up in output without a large physical footprint, the Steelhead Small Wood Stove is UL approved for residential use and designed for homes and cabins. It is a practical fit for single-zone or open-plan heating in moderately sized spaces. If you have questions about how these models apply to specific cabin or small-home configurations, the Wood Stoves, Tiny Homes & Cabins FAQ page covers common scenarios in detail.
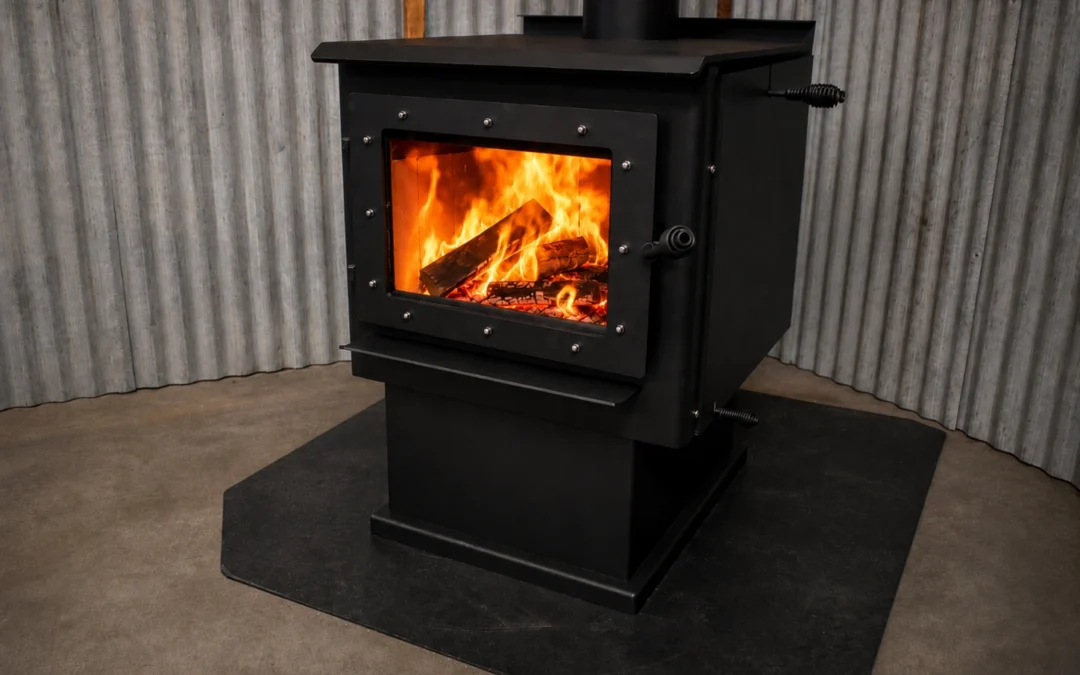
For whole-home heating, larger zones, or shop applications, the Chinook Wood Stove is designed for homes and shops and built to handle higher output demands. It features Just Right Burn Technology, powered by our patented VCV system, which mechanically helps regulate airflow during low- and medium-burn settings without relying on electronics. That mechanical regulation gives you consistent performance across varied burn conditions.
All three stoves are designed and built in Post Falls, Idaho, with a focus on durable construction, dependable heat output, and long-term value.
One factor that sometimes overrides output considerations entirely is installation geometry. Before finalizing your selection, confirm clearance-to-combustibles, hearth pad dimensions, and chimney height requirements for your specific model. A stove that fits your heating profile must also fit your space safely.
Installation Requirements That Affect Your Buying Decision
Even after you’ve identified the right output range and matched a stove to your heating zone, installation constraints can quietly eliminate candidates from your short list. Work through these factors before you purchase.
Clearance-to-combustibles is a model-specific, non-negotiable safety requirement. UL-listed stoves can typically be installed much closer to combustible walls than unlisted models, sometimes as close as 6 inches with appropriate heat shields, while unlisted stoves require at least 36 inches. If the stove that meets your output needs cannot be safely positioned in your intended space, it is not the right stove for that location.
Hearth pad dimensions vary by stove and listing status. Most residential wood stoves require a non-combustible floor protector extending at least 18 inches in front of the loading door and beneath the full stove body. Confirm the exact dimensions required for your specific model before you finalize your floor plan.
Chimney configuration directly affects draw. A straight vertical chimney with minimal horizontal offsets performs most consistently. If your installation requires a long horizontal connector run or multiple elbows, draw performance can suffer, and stove selection should account for that limitation. Single-wall vent connectors require at least 18 inches clearance from combustibles; double-wall connectors reduce that requirement significantly.
Permits and local code requirements apply in most jurisdictions. Your local authority having jurisdiction (AHJ) sets specific rules for clearances, chimney liner type, and required inspections. Contact your AHJ before purchasing, not after.
UL listing and EPA certification carry real weight here. Listed stoves come with manufacturer-specified clearance instructions that inspectors rely on. Many jurisdictions require certified stoves for code compliance. Confirm that any stove you’re considering carries the certifications your installation type requires.
Wood Fuel Quality and How It Affects Stove Performance
Once your stove is properly sized and installed, the fuel going into it determines how much of that potential actually reaches your living space.
Moisture content is the single most important fuel variable. Adequately seasoned wood, typically tested at low moisture content, burns cleanly, produces steady heat, and delivers the output your stove was sized to provide. Green or unseasoned wood forces the fire to spend energy evaporating water first, which drops usable heat output significantly and accelerates creosote buildup in your flue. No stove, regardless of quality, performs well on wet wood.
Species matters, but condition matters more. Hardwoods like oak, maple, hickory, and ash produce more heat per cord than softwoods like pine, fir, or cedar because of higher wood density and BTU content per pound of dry material. That said, well-seasoned softwood will outperform green hardwood every time. If softwoods are what grows locally and you season them properly, they are a practical fuel choice.
Check your firebox dimensions before you source wood. Check that the stove’s firebox can accept the log lengths available from your supplier before you commit, or you will be re-splitting every load.
Plan your fuel supply as part of the sizing conversation. One excellent cord of seasoned oak does not offset a season of burning green wood. A realistic fuel plan covering your source, storage space, and allowing adequate seasoning time before burning is what makes your stove perform the way it was sized to perform.
A wood moisture meter removes all guesswork. These tools are widely available and inexpensive. Check every load before it goes into the firebox and target low moisture readings consistently.
Five Questions to Answer Before You Buy
With your fuel plan in place, you have one final checkpoint before committing to a model. Answer these five questions honestly, and the right stove becomes obvious.
1. What is your actual heating zone volume? Measure length, width, and ceiling height for every area the stove needs to heat, including open lofts. Multiply those dimensions to get cubic footage. A room with a 12-foot vaulted ceiling holds significantly more air than the same footprint with an 8-foot ceiling, and that difference changes your output requirement.
2. How would you honestly describe your thermal envelope? Well-insulated modern construction, average older framing, or drafty with single-pane windows and unsealed bypasses? A tight, well-insulated home loses heat slowly and needs less stove output. An older drafty structure loses heat quickly and needs more. Be honest here; optimism leads to an undersized stove.
3. What is your climate zone and realistic design temperature? Design temperature is the coldest typical night your stove must handle, not an extreme outlier. A home in northern Idaho or Montana faces a very different demand than the same structure in Virginia. Your stove needs to cover your actual coldest nights, not average winter conditions.
4. What role will this stove play, and how often will you manage it? Primary heat used daily, zone heat for one living area, or backup heat only? Daily primary use favors a stove that burns efficiently in the mid-range. Intermittent use favors a stove that comes up to temperature quickly. Your answer also determines how much time you are willing to spend loading and tending fires each day.
5. What are your installation constraints? Measure available clearance to combustibles, note your chimney configuration, and confirm hearth pad dimensions. Check local permit and code requirements before purchasing. A stove that fits your output needs but cannot be safely installed in your space is simply the wrong stove.
Start With the Space, Then Choose the Stove
Answer those five questions honestly, and the right stove stops being a guess.
Wood stove sizing is a diagnostic problem first. Buyers who work through their heating zone volume, construction quality, climate, and burn habits before browsing models arrive at a short, confident list rather than a catalog full of maybes. The stove that actually works for your home is the one matched to your real heat loss variables and installed in a position where it can distribute warmth effectively, not the one with the most impressive BTU number on the label.
At Flame Innovation, we build three residential and shop stoves to cover that range. The Caboose, Steelhead, and Chinook cover the range from compact cabin heating to whole-home and shop output, the same three models described in detail in the matching section above.
Your next step is straightforward: use the five questions above to build your profile, then explore our product lineup to find the stove that fits your space. If you want help matching the right model to your situation, reach out to us directly. We are glad to help you get it right.
Conclusion
Sizing a wood stove correctly is not complicated, but it does require working through the right variables before you shop. Heat loss, room volume, insulation quality, climate, and your actual burn habits all shape which stove will perform well in your space. BTU ratings on labels are a starting point, not a guarantee, and the right stove is the one matched to your real conditions rather than the largest number you can afford.
Use the five questions above to define your heating needs, then review the Chinook wood stove and our current installation guides and manuals. The EPA’s archived wood-burning installation and maintenance guidance explains why sizing, venting and professional inspection belong in the buying decision.